PS4 restoration and 9.00 Jailbreak
Table of Contents

🎮 PS4 restoration and 9.00 Jailbreak 🎮
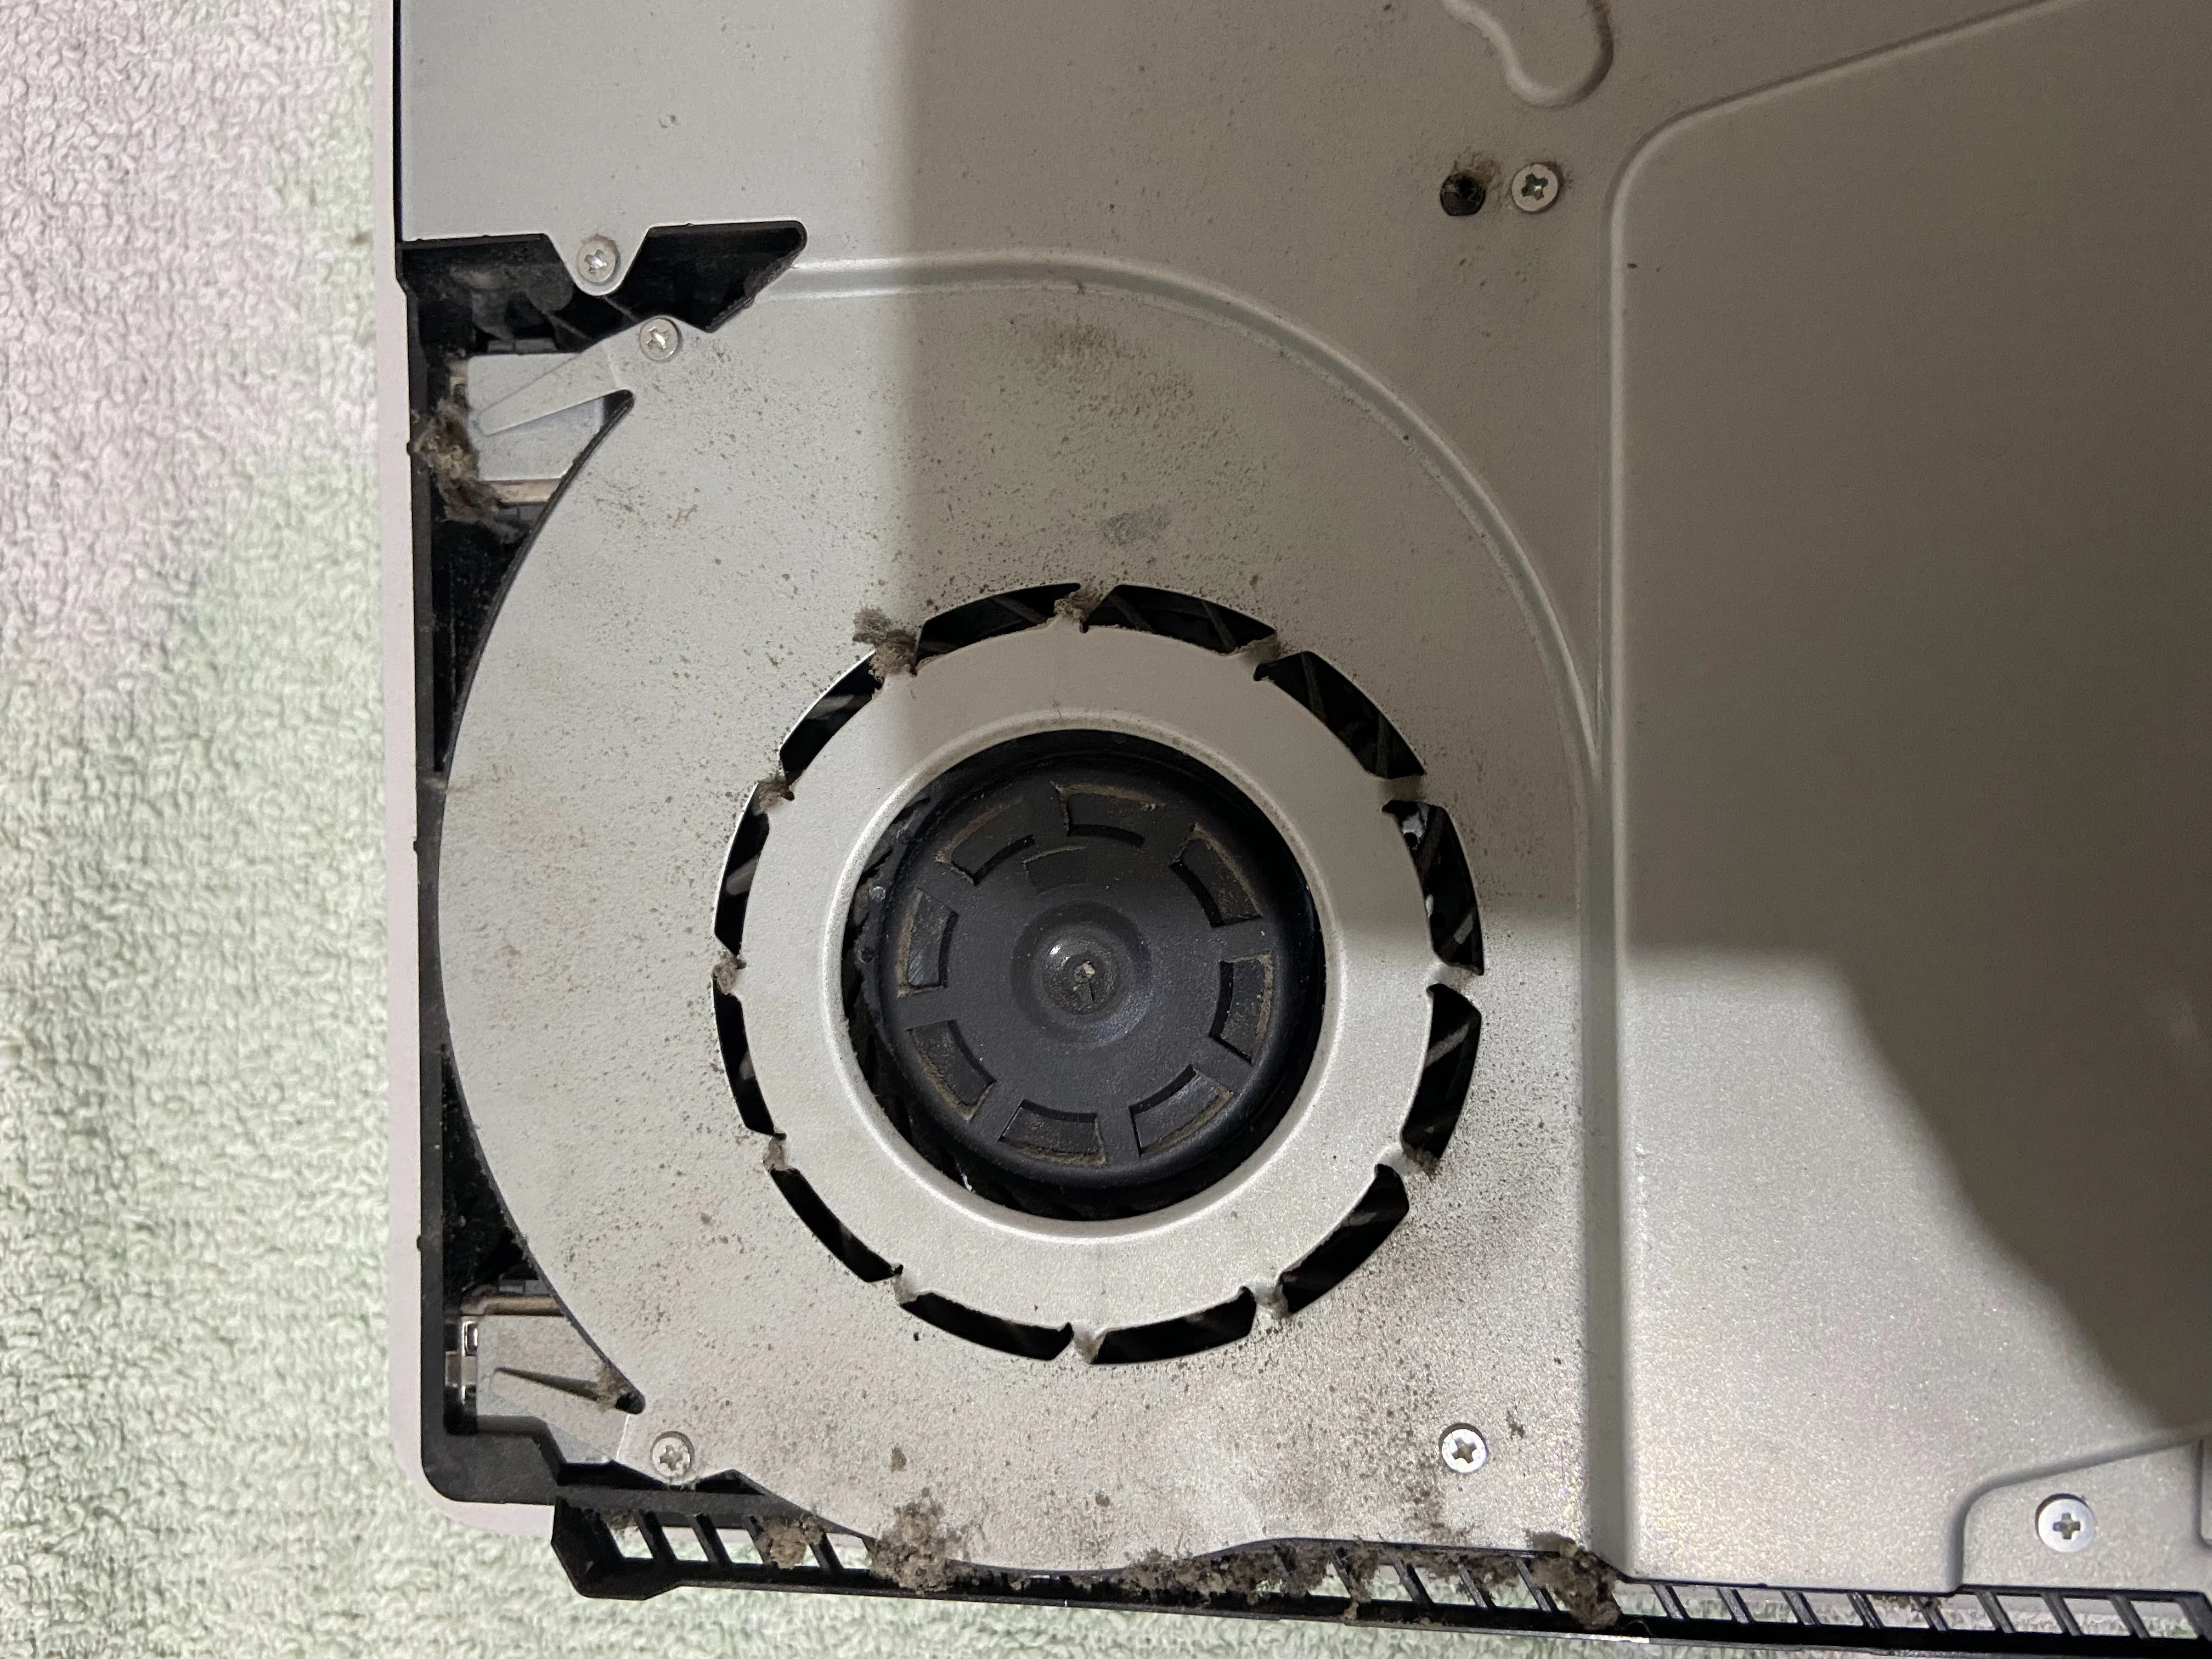
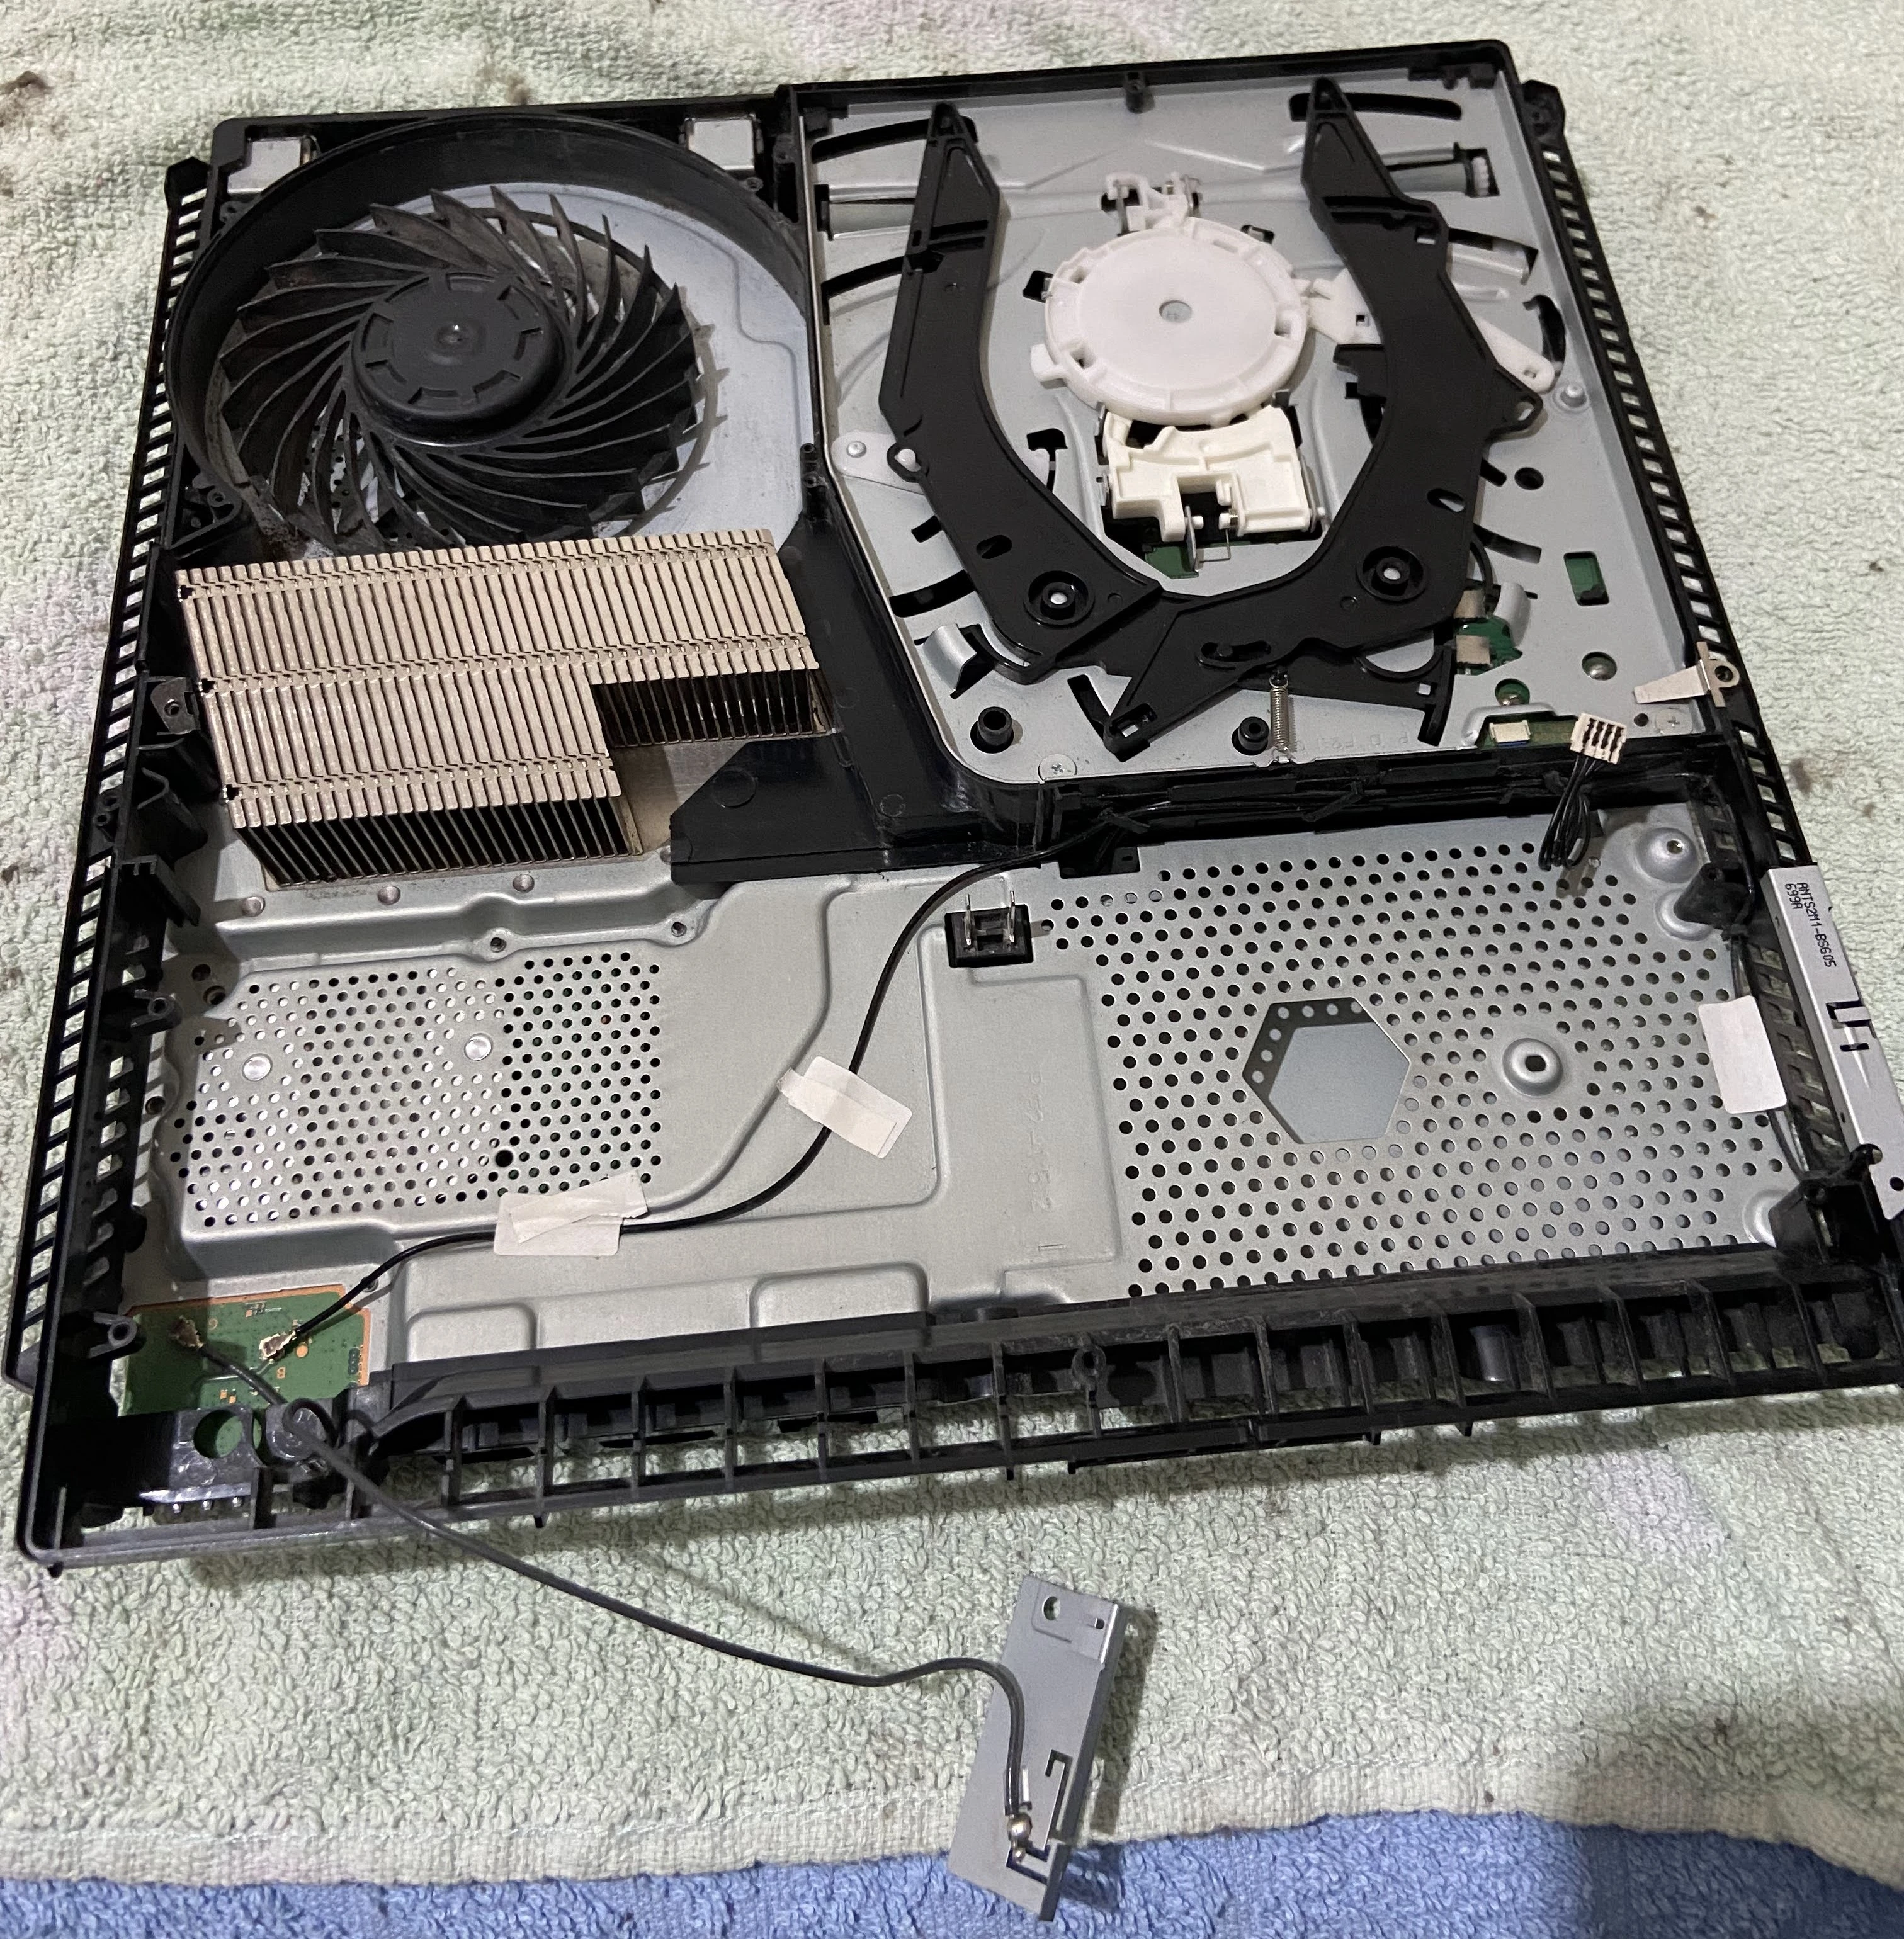
I bought a used PS4 Slim console to play with, and it was on 8.50 firmware and was never cleaned inside. The first thing I did was open it up to see what was “under the hood.” When I opened it up, I saw dust and when I turned it on the PS4 was soo loud. That meant the thermal paste needed to be replaced, and the fans needed to be cleaned. Here is a picture of what was inside:
I planned on installing Linux on this PS4, but that requires a jailbreak and a specific firmware version, and that is why I bought it with a low enough firmware version so I can upgrade it to 9.00.
You cannot downgrade firmware on the PS4; you can only upgrade it !
What do you need:
- Formated USB stick
- Thermal Paste
- Screwdrivers
- Rubbing Alcohol
- Patience
- Computer/Laptop
Restoration: #
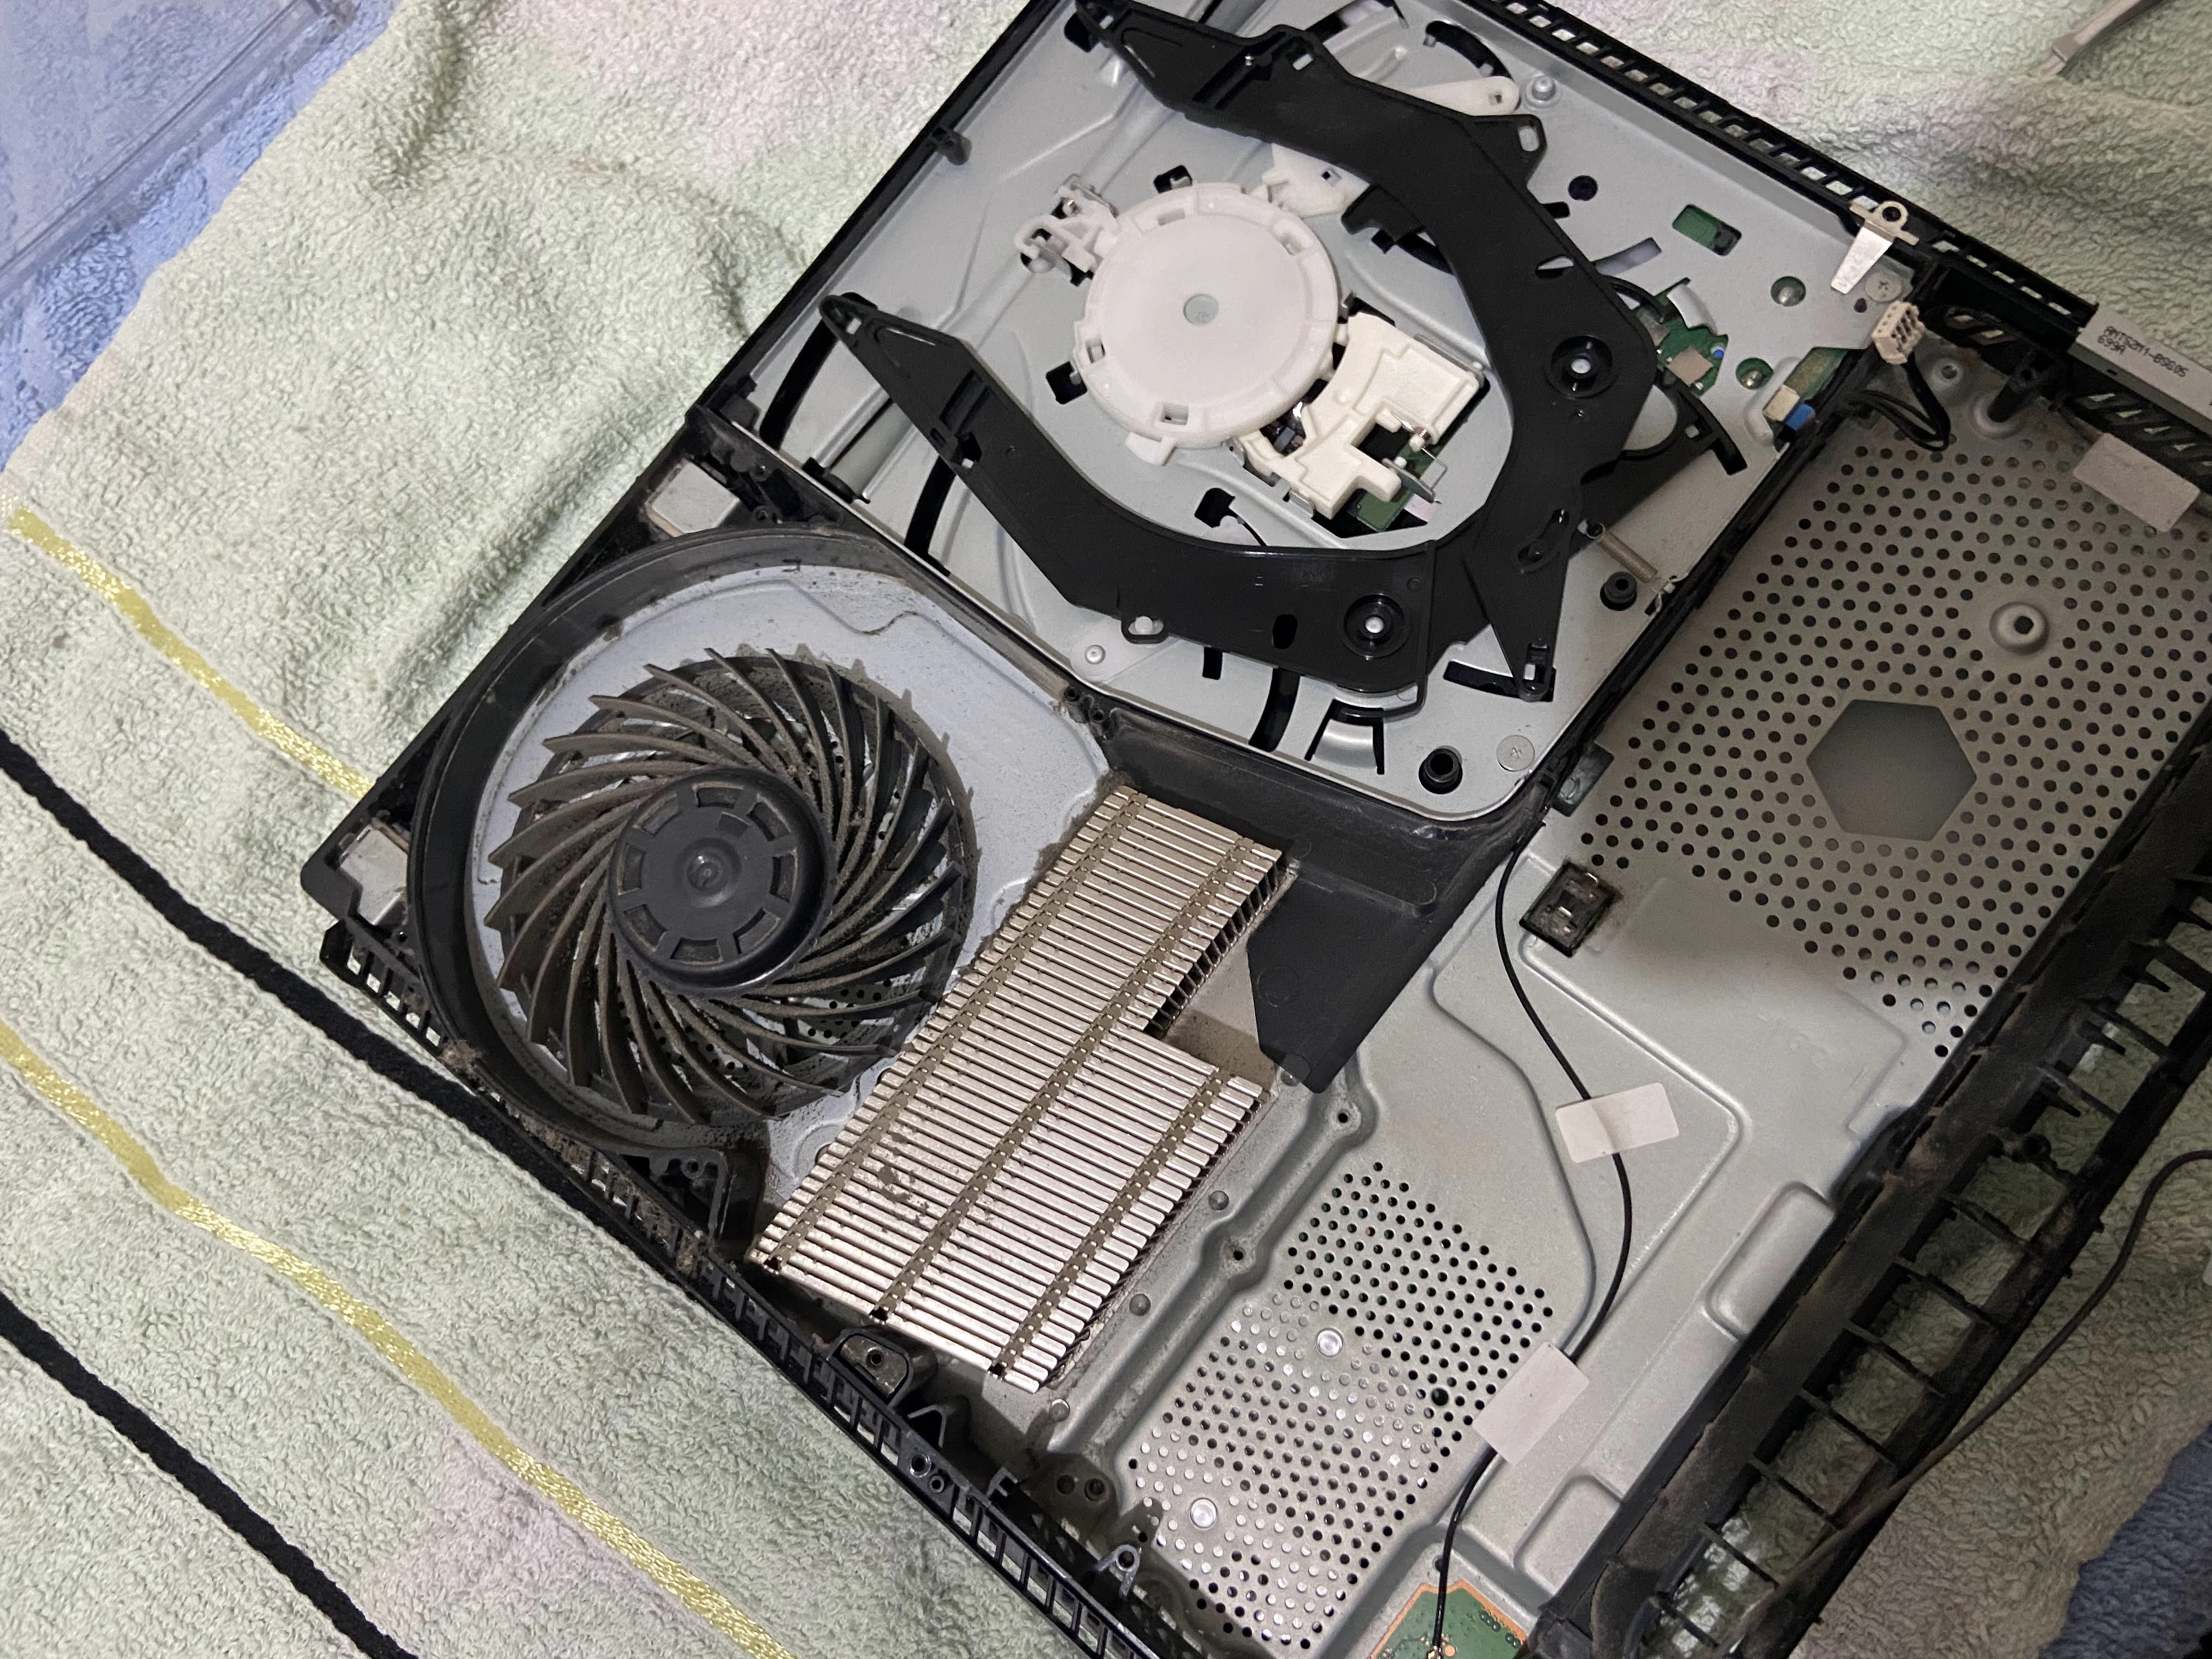
Firstly I opened the PS4 up, unscrewed some screws, and this is what the insides looked like:
Now I use rubbing alcohol to get rid of the old thermal paste.
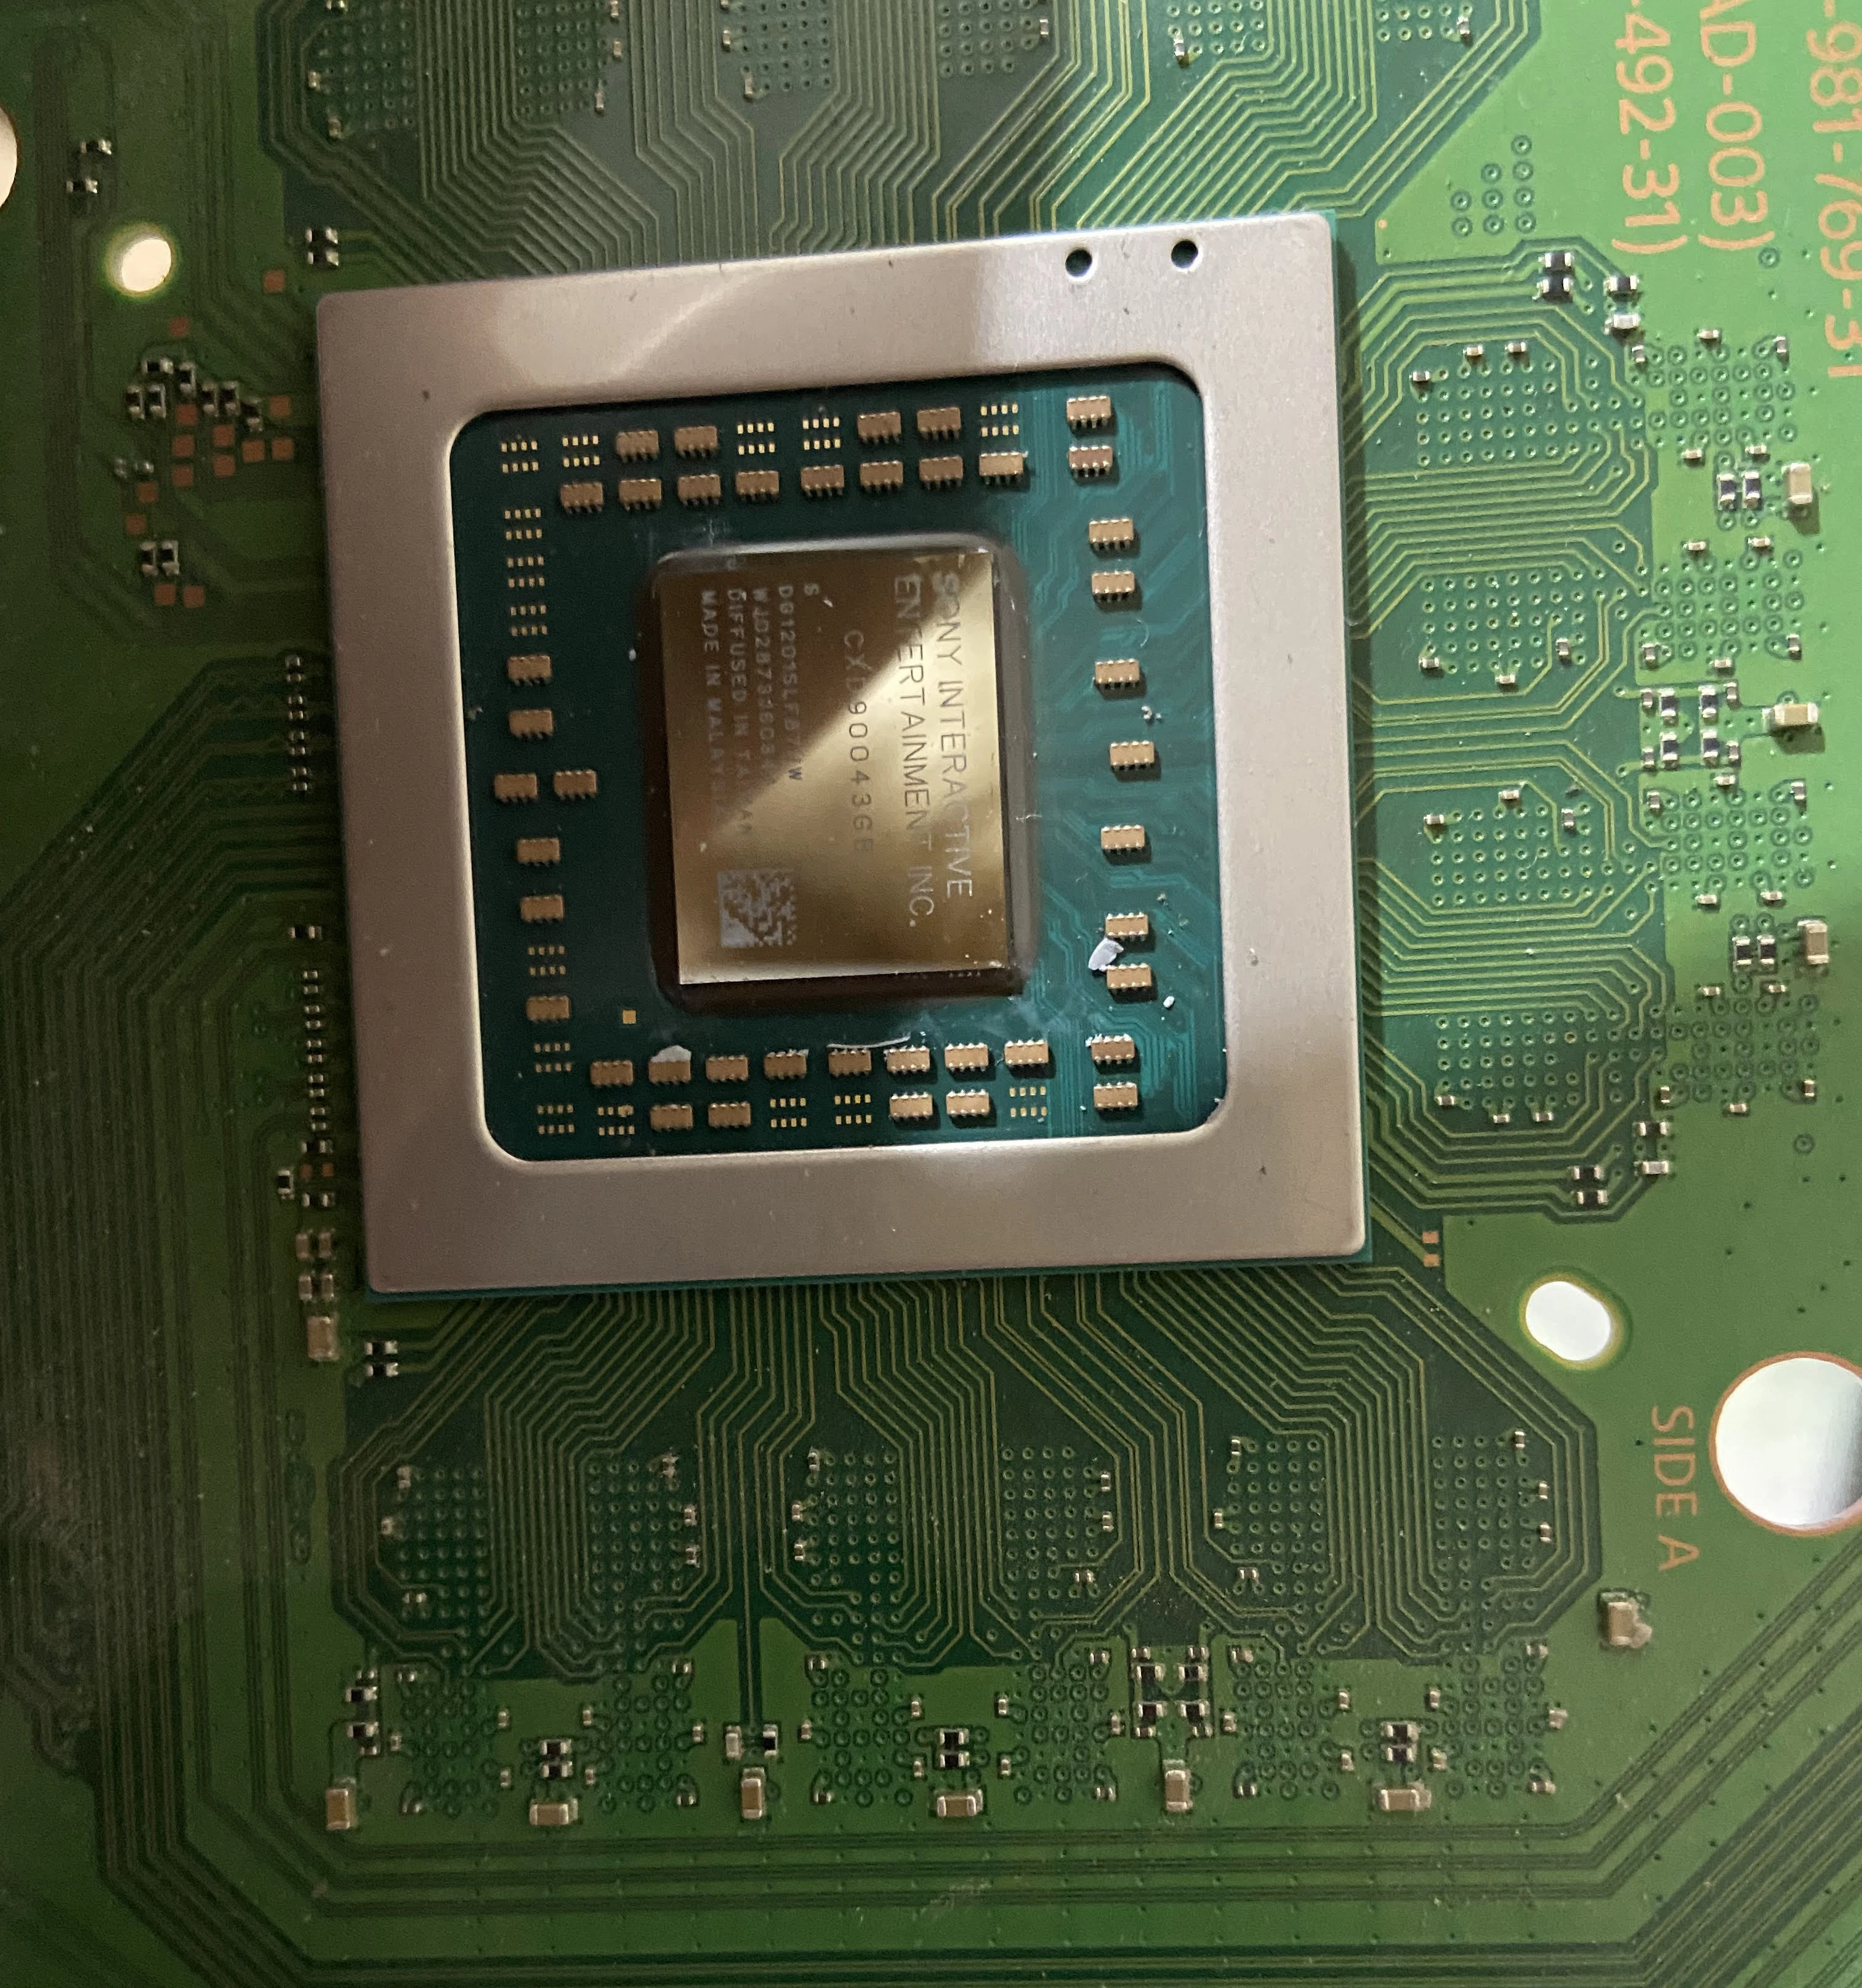
The new thermal paste I applied is Arctic MX-4.
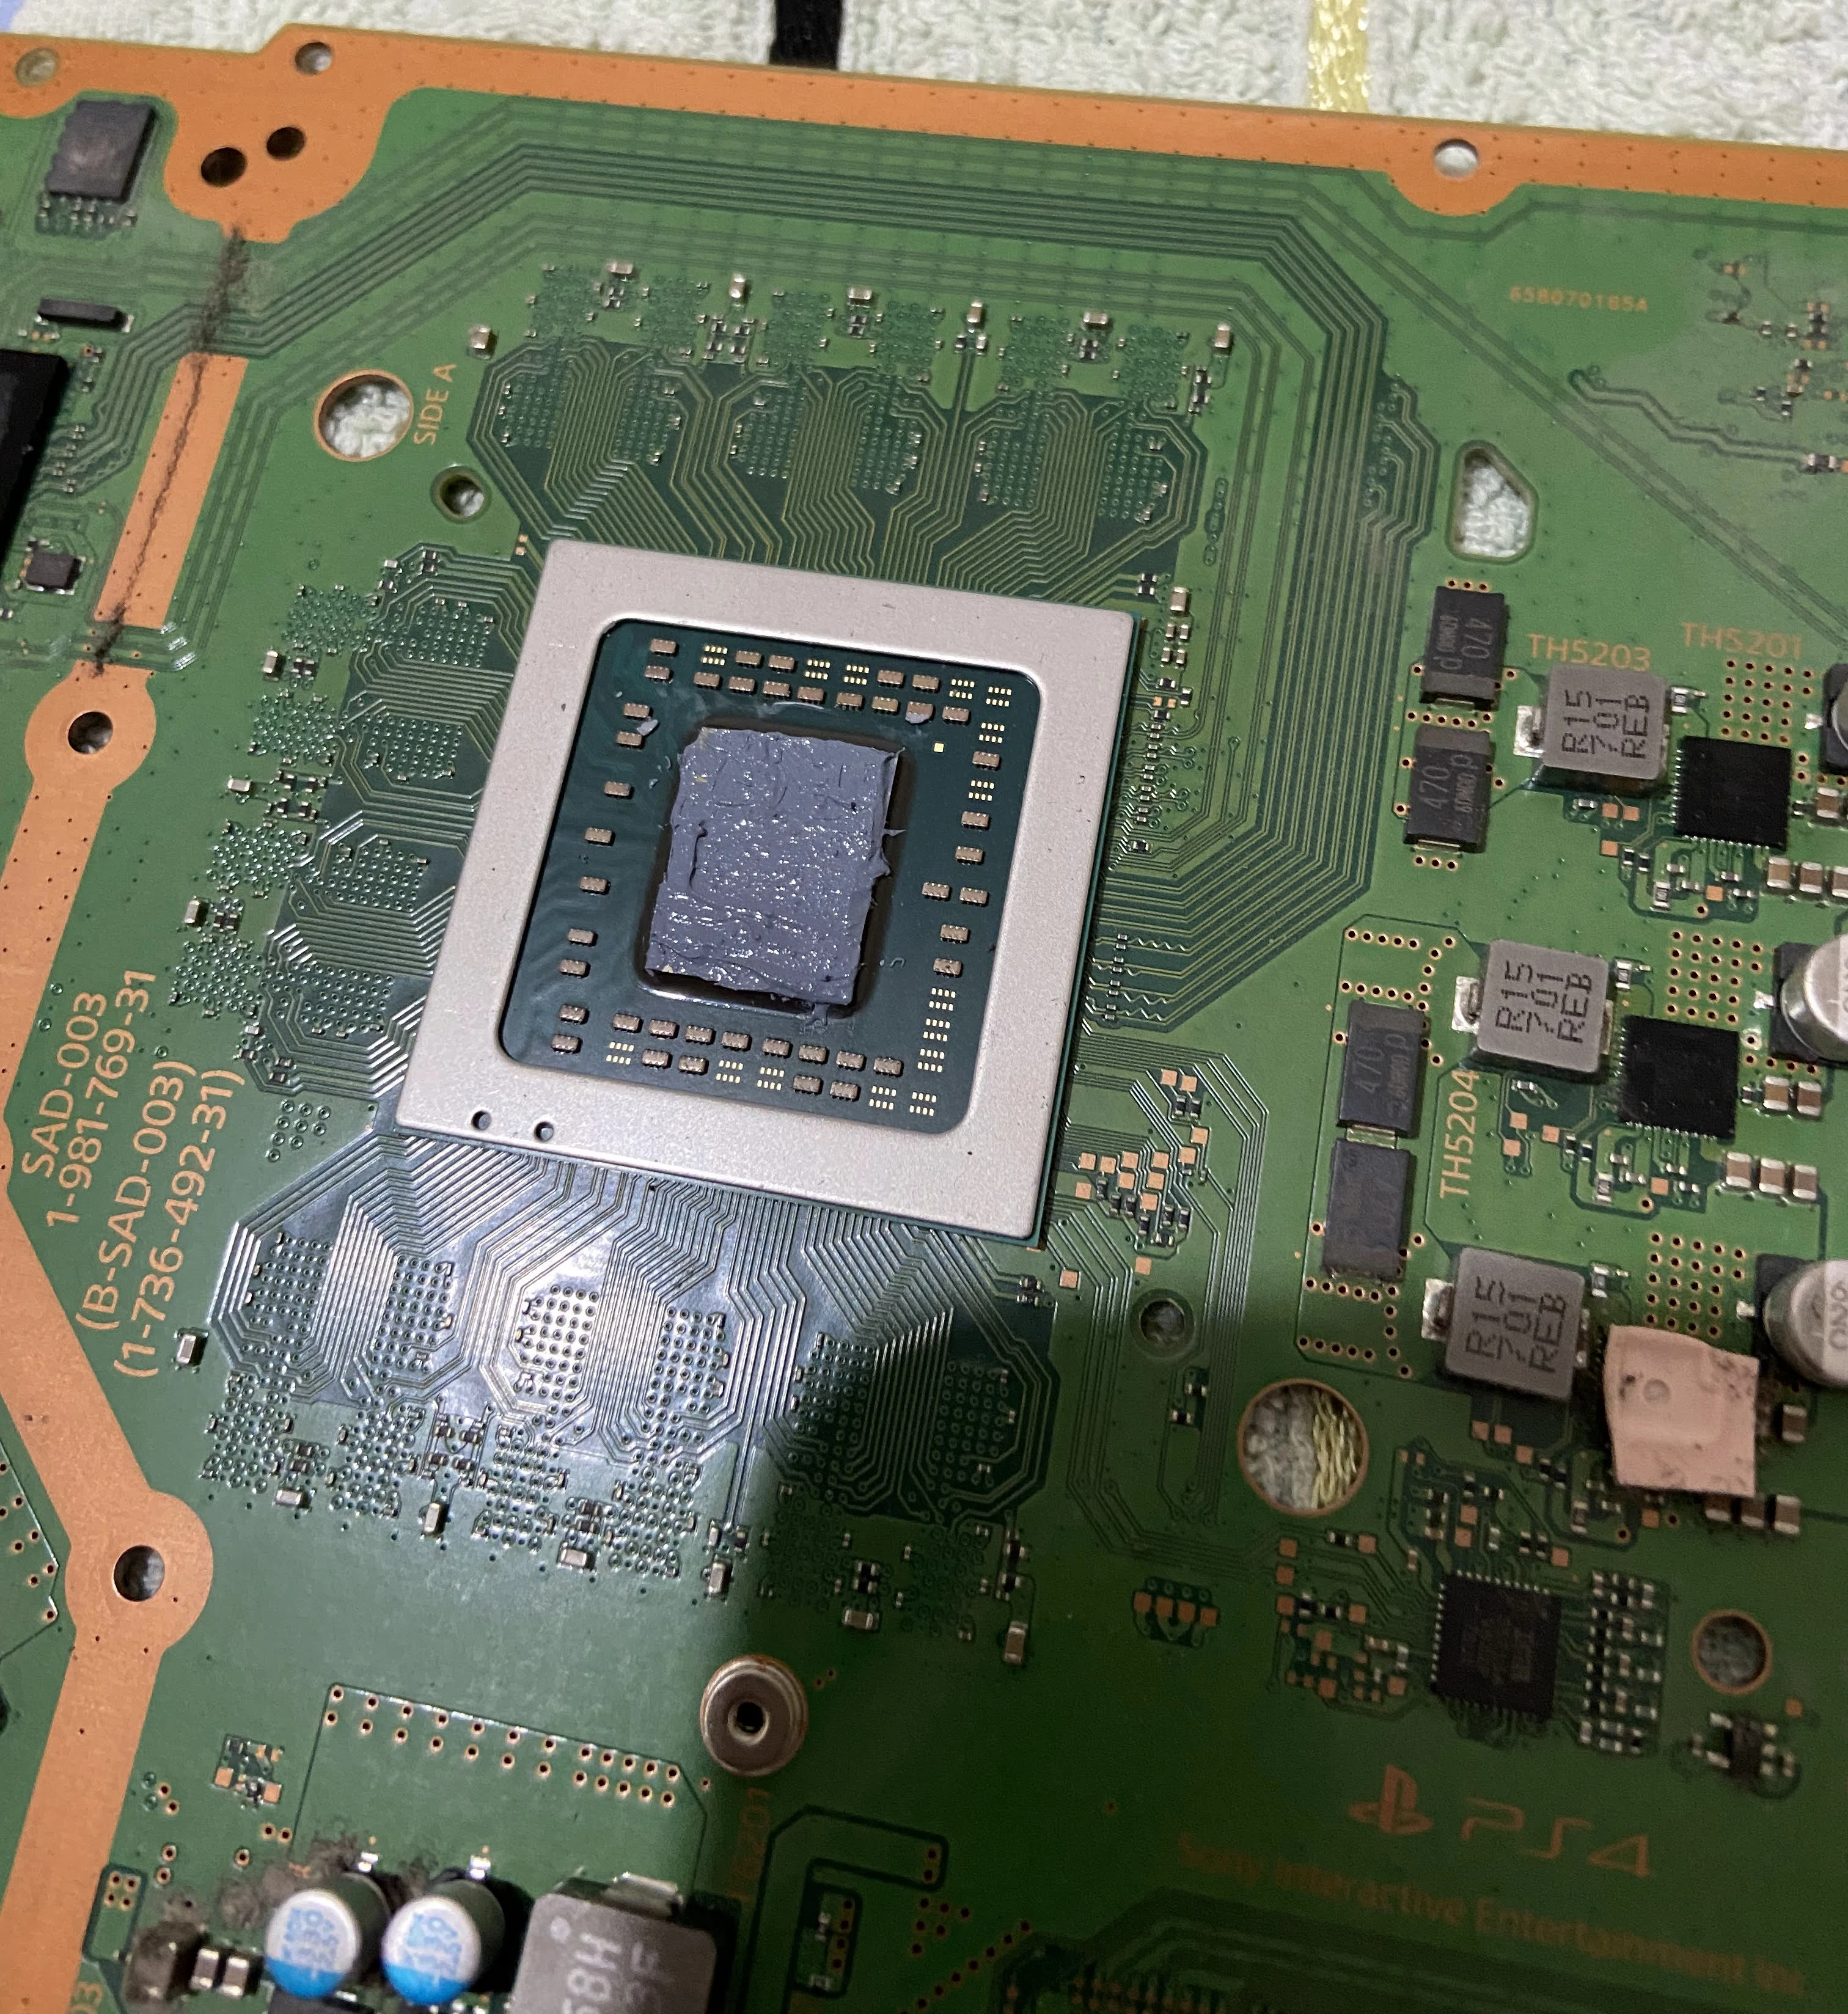
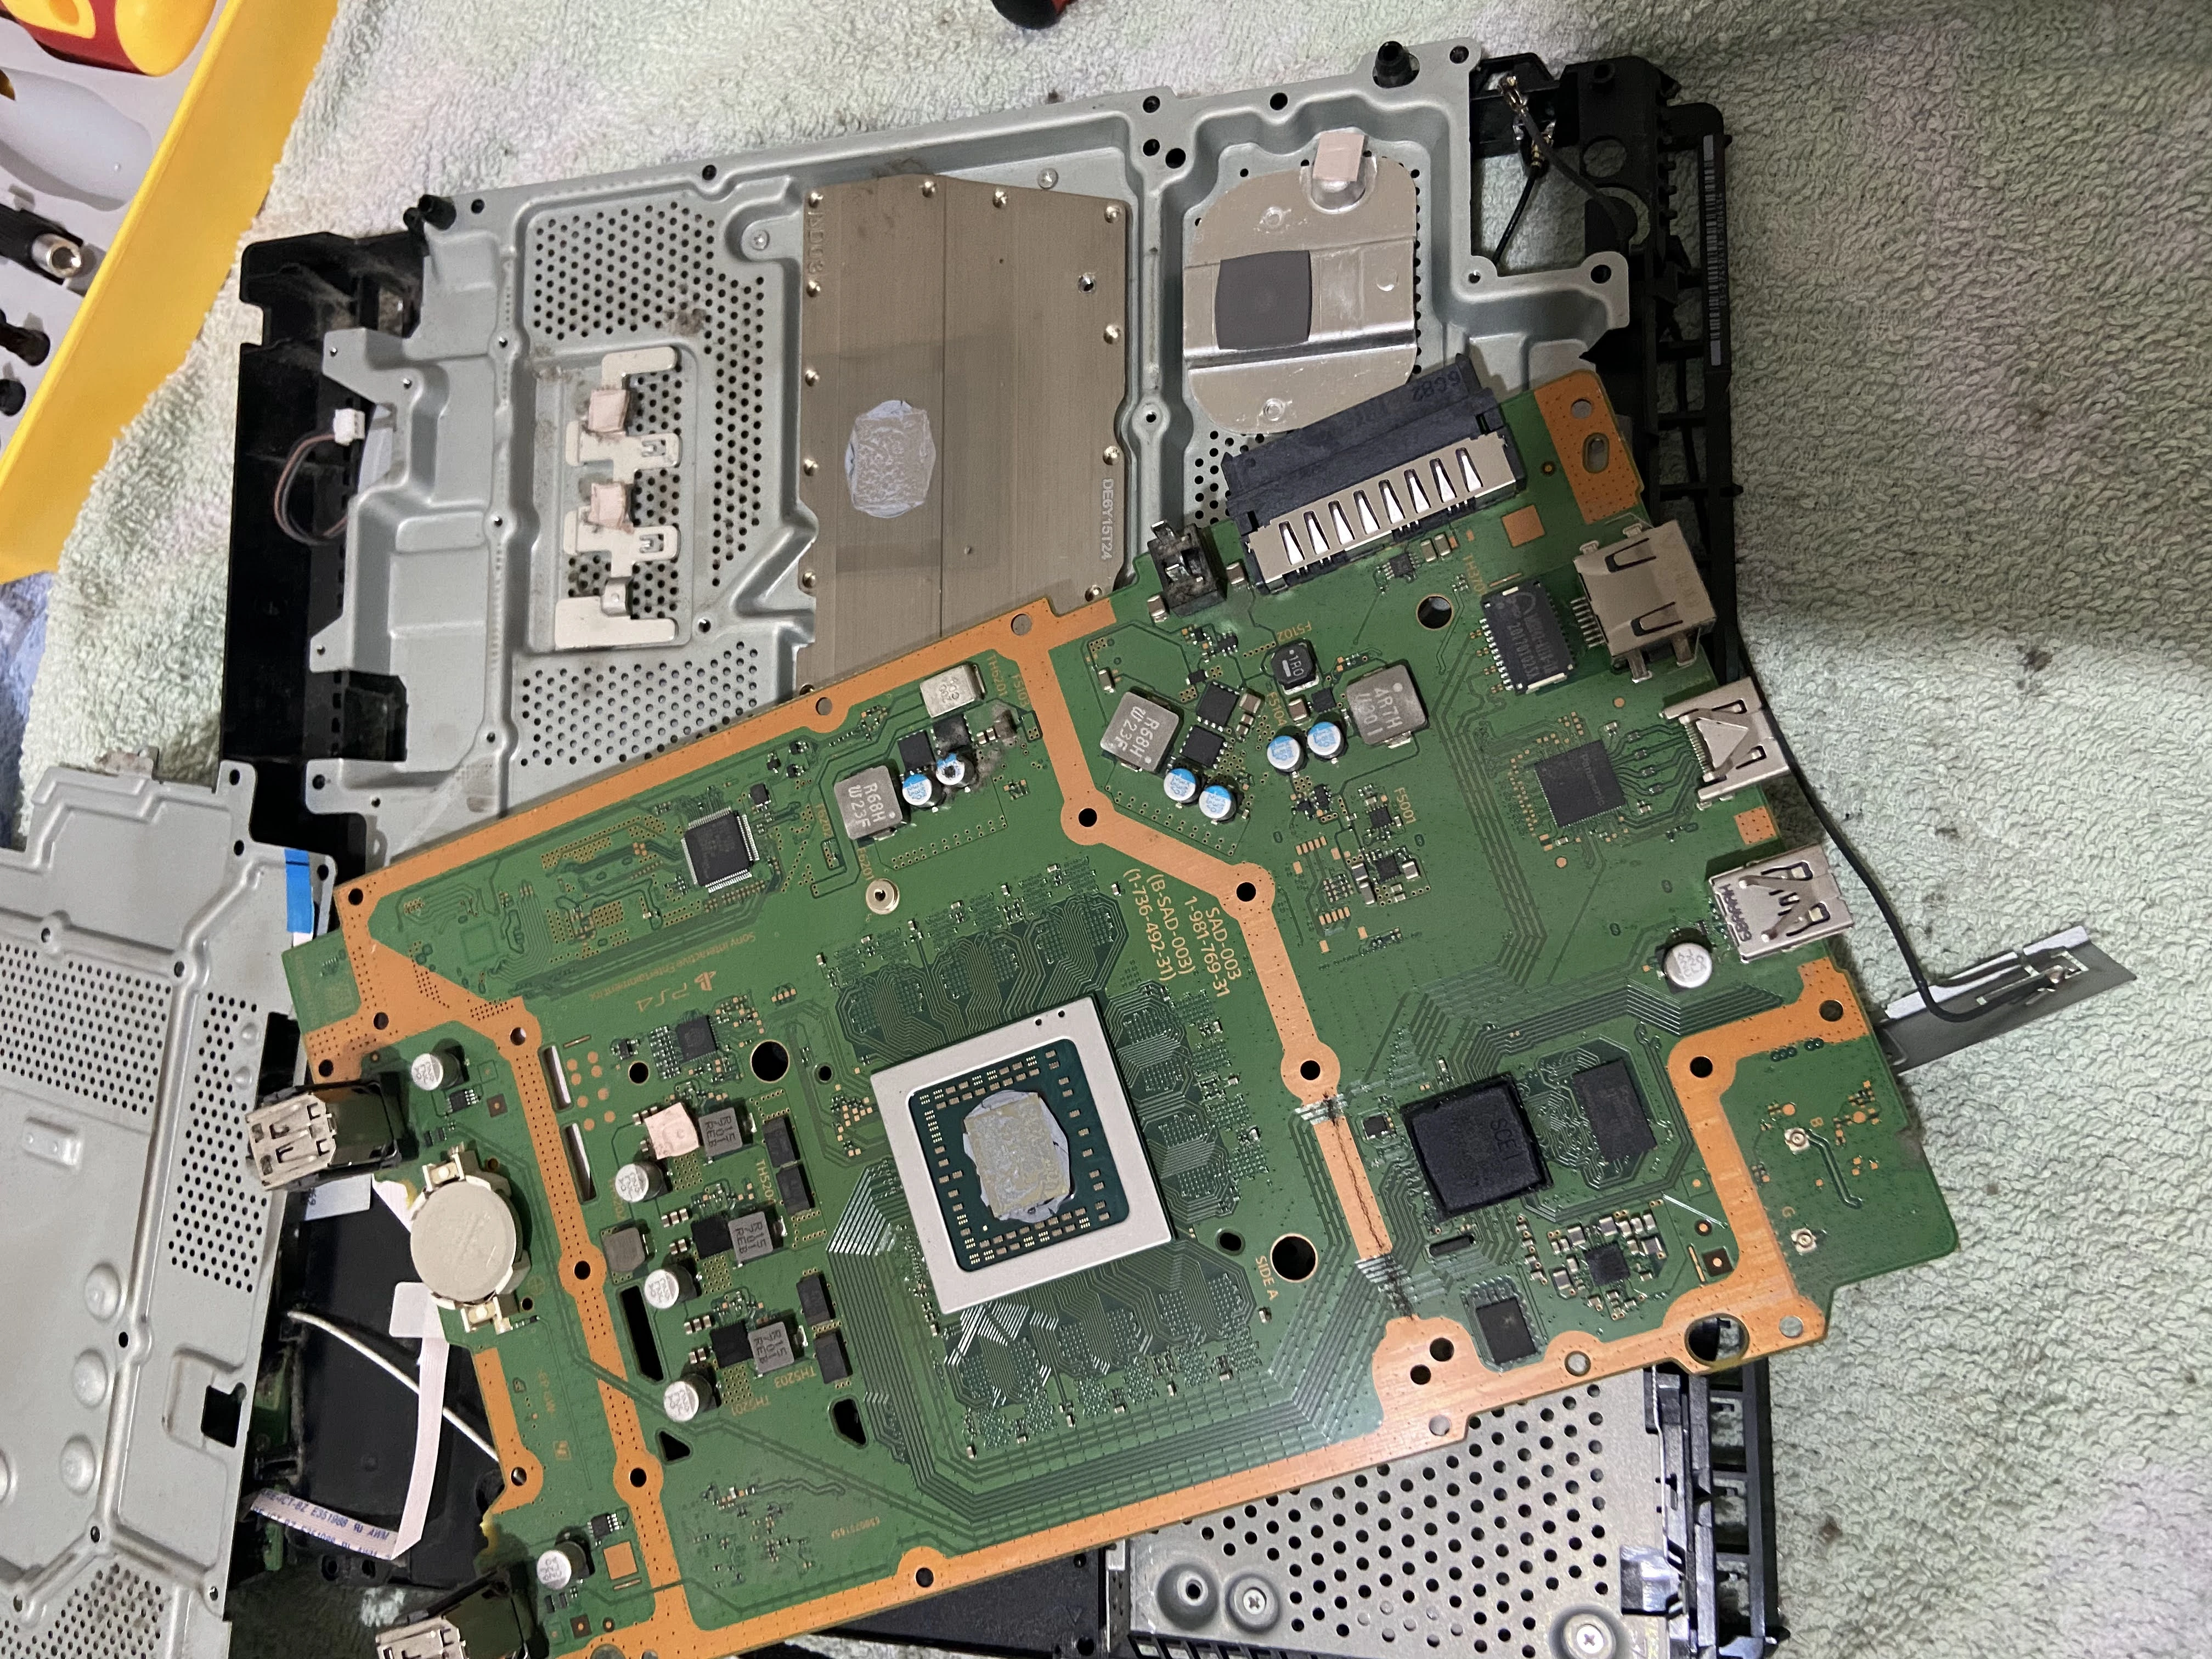
After cleaning the fan and the heatsink, this is what the result looks like:
Much better !
9.00 Jailbreak #
After I assembled the PS4 Slim, I booted it up without Internet and did a factory reset by going into the Settings/Initialization/Initialize PS4. This option erased everything on the PS4 that was previously on, including games and accounts.
Now comes the fun part, the jailbreak. Firstly go into Settings/System/Automatic Downloads and make sure to uncheck all boxes.
After that, go to Settings/Network and uncheck the box that says Connect to the Internet. This option prevents the PS4 from downloading the latest firmware update.
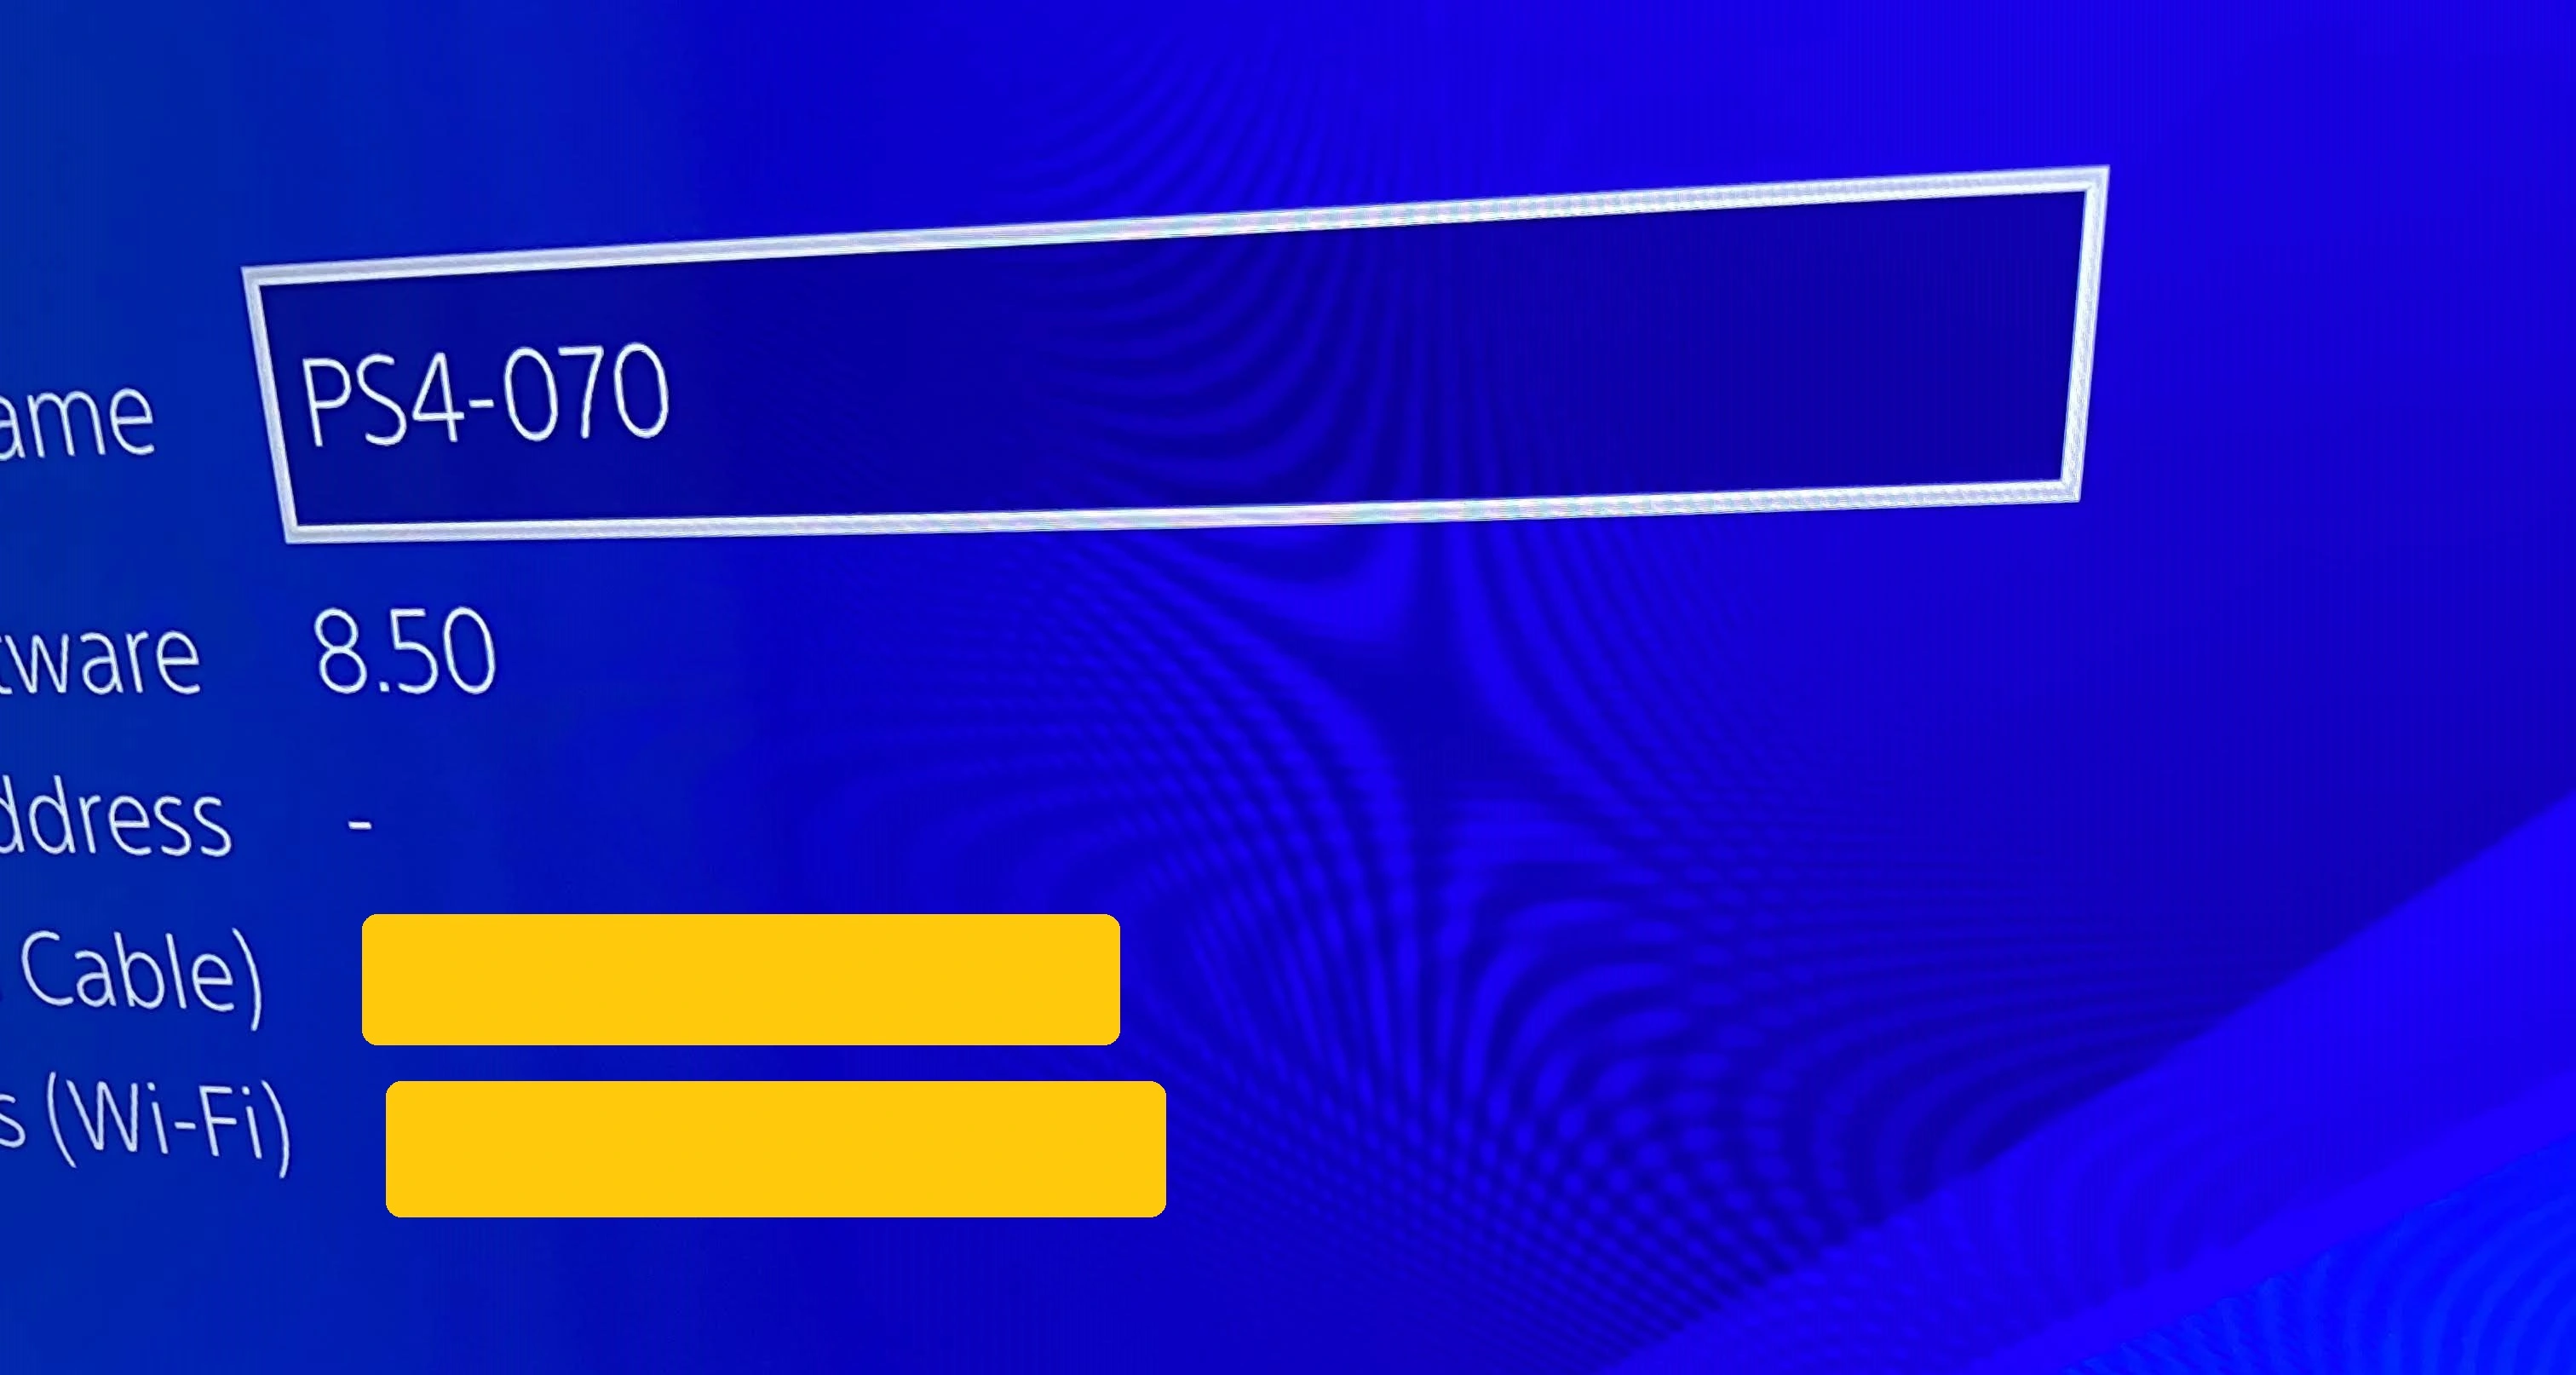
Now go to Settings/System/System Information and see your firmware version. I have the 8.50 version, so I need to update my PS4 to 9.00 manually.
Updating the PS4 to 9.00 #
- To update the PS4 to 9.00, you will need a USB drive and a PC. First, you have to get the 9.00 firmware. There are two websites one has faster downloads but requires a free account, and the second one has slower downloads but requires no account.
Whichever you choose, make sure to download the 9.00 firmware.
After the download, make sure to name the file PS4UPDATE.PUP
Now, format it in exFAT to your USB drive.
After your USB has done formatting, go to the root folder of your USB and make a new folder called PS4, go into that folder and create another new folder called UPDATE, and then inside the UPDATE folder, you are going to copy the PS4UPDATE.PUP file. Keep in mind that the folders have to be in all caps.
Now eject the USB drive, go over to the PS4 and check your notifications and clear them!
Plug your USB drive into PS4 and go to Settings/System Software Update, which should detect the update from your USB to 9.00. Follow the instructions on the screen and update the PS4.
Jailbreaking the PS4 #
After you are on the 9.00 firmware version, go to Settings/Network and check the box we unchecked earlier, Connect to the Internet.
Now go to the option below Set Up Internet Connection, you can use either WiFi or Ethernet then choose Custom, you can choose if you want DHCP or a static IP, then choose Do not specify for DHCP hostname and make sure to choose Manual for the DNS Settings!
As my primary DNS, I use 192.241.221.79, and as my secondary DNS, I use 165.227.83.145! These DNS IPs block all connections to Sony’s servers so that the PS4 will not accidentally get an update.
After the DNS has been specified, click next and choose Automatic for MTU Settings and Do not use for Proxy Server.
Now unplug the USB drive from the PS4 that had the 9.00 update file and plug it back into the PC.
On the PC, you will have to download Rufus and the exfathax.img from Github. Open Rufus, select your USB drive, and as the ISO, select the exFAThax.img file and click Start in Rufus.
Now go to the PS4 and before you plug in your USB, open the PS4 web browser and make sure to clear all history and cache from it. After that, you can use a host you like that offers payloads.
I use Karo218 !
Now, after you have cleared all your browsing history, cookies and data, go to the host and click on 9.00 Gold you will have to wait for the exploit to cache itself for offline use. After it is finished, click on the GoldHenV2.2.4, and the exploit will tell you when to plug in your USB.
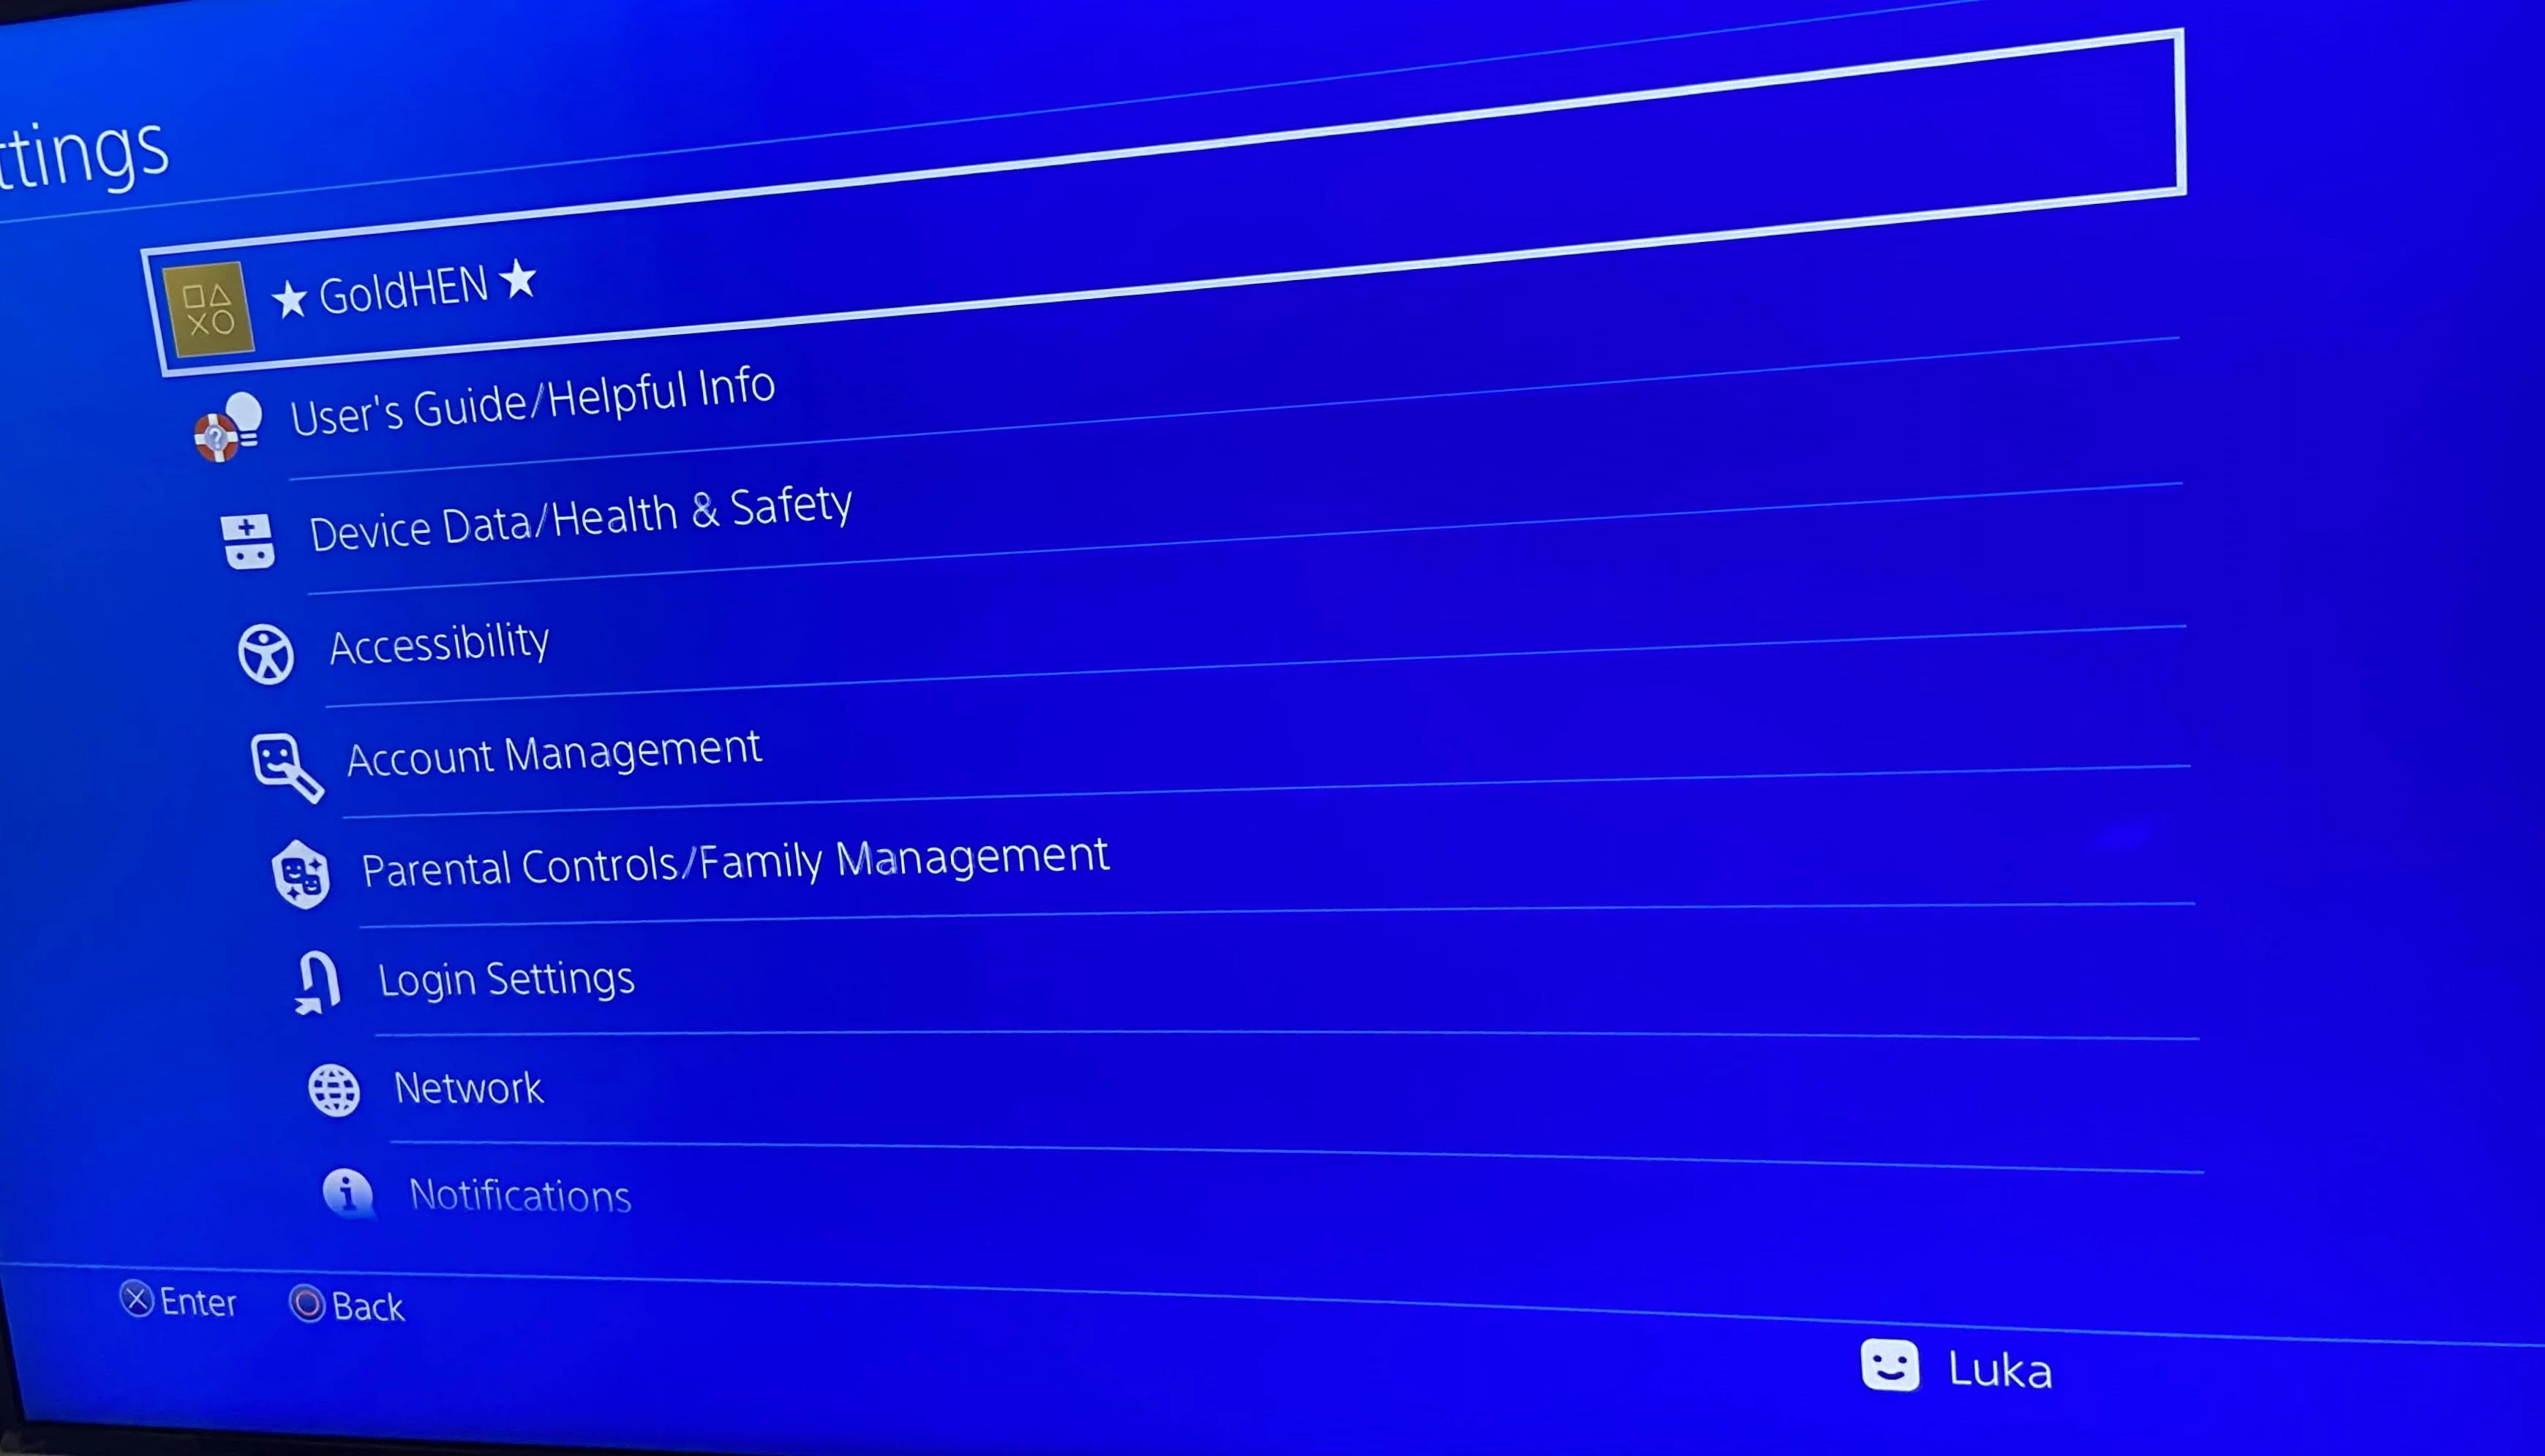
Wait for the payload to display the GoldHEN notification, and you have a jailbroken PS4.
This Jailbreak is not persistent, which means after a shutdown or a reboot, you have to do everything again, one solutiion is to put your PS4 in rest mode, or you could make everything automatic, but it requires an ESP32-52 or a Raspberry Pi!
Final result #
Conclusion #
Enjoyable project to do, significantly since the price of the PS4 has dropped because of the PS5 release. Cleaning up the PS4 was satisfying, and I must say it is tricky to open the Slim model. Jailbreak was successful as expected, and for me, it worked almost 80% of the time, it had some crashes here and there, but a reboot fixed it. I am looking forward to installing Linux on the console.